-1140x400.png)
If you’ve ever messed around with small DC motors, you’ve probably seen the 775 motor everywhere. It’s strong, easy to find, and super reliable. But here’s the thing - to make it actually useful for drilling, sanding, or even polishing, you need one little attachment: the Mini Drill Chuck for 775 Motor.
Let’s be real - installing it looks simple until you actually try it. The chuck doesn’t fit right, it wobbles, or you tighten it too much and it jams. I’ve been there too. So, let’s go through the setup step by step, in plain English, so you don’t waste your time figuring it out.
Installation of a Mini Drill Chuck for 775 Motor
Step 1: Know What You’re Working With, Mini Drill Chuck for 775 Motor
The Mini Drill Chuck for 775 Motor is basically the grip that holds your drill bits. Think of it as the “hand” of the motor. It lets you attach and change bits easily - whether you’re drilling wood, acrylic, or PCB boards.
Most chucks fit onto the 5mm shaft of the 775 motor. Still, double-check your motor before you start. If the sizes don’t match, don’t try forcing it - that’s the quickest way to ruin your motor shaft.
Step 2: Gather Your Stuff
Before you start, get your tools ready:
775 DC motor
Mini drill chuck (0.3mm–6mm range works well)
Small wrench or spanner
Hex key (for the locking screw)
Pliers (optional, but handy)
Trust me, having these next to you will make things ten times easier.
Step 3: Clean That Motor Shaft
I know, sounds boring - but it matters.
Wipe off any oil or dust from the shaft using a clean cloth. A smooth, dry shaft means your Mini Drill Chuck for 775 Motor will fit tight and spin straight.
You’d be surprised how much difference this one small step makes.
Step 4: Slide On the Adapter
Most mini chucks come with a small metal adapter. That’s what connects the chuck to the motor shaft. Just slide it gently onto the shaft - don’t hammer it or twist too hard.
If it feels tight, rotate it slightly while pushing. It should go in snug, not loose.
Step 5: Lock It in Place
You’ll see a small screw on the adapter. That’s your safety lock. Use the hex key to tighten it so the adapter doesn’t slip when the motor spins.
Pro tip: Don’t overtighten. You’re not closing a jar lid - just enough pressure to hold it steady.
Step 6: Attach the Chuck
Now screw the Mini Drill Chuck for 775 Motor onto the adapter. Keep turning it until it’s firm and you feel resistance. It should stay straight without wobbling.
By the way, this is where most people go wrong. If the chuck isn’t perfectly centered, your drill bit will dance around when it spins. So, take a second to check alignment before you power it on.
Step 7: Test the Rotation
Once everything’s in place, give the motor a gentle test. Start with a low voltage — around 6V or 9V - and watch how the chuck spins.
If it’s smooth, you nailed it. If it shakes or vibrates, stop right away and recheck the adapter and alignment.
Remember, a little wobble at low speed becomes a big problem at high RPM.
Step 8: Try It Out with a Drill Bit
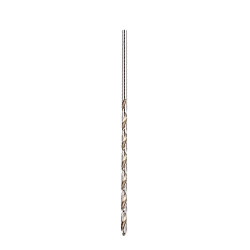
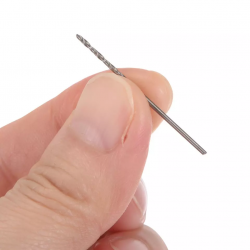
Now for the fun part. Insert a small drill bit into the chuck and tighten it using your hand or the chuck key (if yours came with one).
Start slow - maybe drill a hole into a piece of scrap wood first. The feeling of that clean spin? That’s when you know your Mini Drill Chuck for 775 Motor setup is spot-on.
Step 9: Keep Safety in Mind
Yeah, I know — everyone skips this part. But seriously, don’t.
Never touch the chuck while it’s spinning.
Always unplug or disconnect power before adjusting anything.
If you’re drilling metal or PCB, wear eye protection.
Keep your fingers away from the bit.
It takes only one small mistake to ruin your project or your day.
Step 10: Maintain It Like a Pro
Once you’re done, clean the chuck and adapter. Dust or metal shavings can jam the mechanism over time. A small drop of oil every few weeks keeps it running smoothly.
Also, check the locking screw occasionally - vibration can loosen it without you noticing.
By the way, if you ever feel the bit slipping during drilling, it’s usually because of a loose chuck or worn-out jaws. Just tighten it again or replace the chuck if it’s too old.
Why This Setup Is Totally Worth It
Let’s be honest - pairing a Mini Drill Chuck for 775 Motor is one of those small DIY upgrades that gives you big satisfaction. It turns a simple motor into a multipurpose mini machine.
You can use it for:
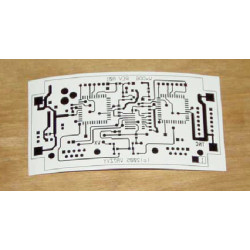
PCB and circuit board drilling
Light woodwork
Jewelry crafting
Model building
Polishing or grinding small parts
It’s compact, cheap, and surprisingly powerful for its size. Honestly, once you set it up right, you’ll start wondering how you ever worked without it.
Final Thoughts
So, that’s the whole deal. Installing a Mini Drill Chuck for 775 Motor is not some complex workshop job - it’s just about being careful and patient.
Make sure everything fits properly, don’t rush the process, and test it slowly at first. The moment it starts spinning perfectly, you’ll realize how satisfying it is to build something that actually works the way you imagined.
Frankly, the best part is - once you’ve done it once, you’ll be confident enough to tweak and upgrade your setup however you want.
So go ahead - grab that motor, fix your chuck, and bring your DIY ideas to life. Shop now!
FAQs about Mini Drill Chuck for 775 Motor
Q1. What’s the standard shaft size for a 775 motor?
Usually 5mm - most mini drill chucks are made to fit that size.
Q2. Can I use this chuck for other motors?
Yes, as long as the shaft matches and the motor isn’t too weak.
Q3. What’s the best voltage for testing?
Start around 6–9V. Once you’re sure everything’s stable, you can go up to 12V.
Q4. Why does my chuck wobble?
It’s usually misalignment. Recheck the adapter and make sure it’s tightened evenly.
Q5. Do I need a chuck key for tightening?
Some mini chucks are keyless - just twist them by hand. Others need a small key, depending on the model.



Leave a Comment